¶ Freezing Your LP
Freezing your LP is a great way for projects to lock up LP in a secure and decentralized way! Often this is a good move to show users that you have dedicated yourself to providing liquidity without the risk of a sudden “rug pull” of liquidity. In our Deep Freezer ANYONE can view what LP is locked, that locked LP’s info and the timeline of when that LP will be unlocked. Let’t take a look at how to lock up the LP!
¶ Adding Liquidity To A DEX (Getting LP Tokens)
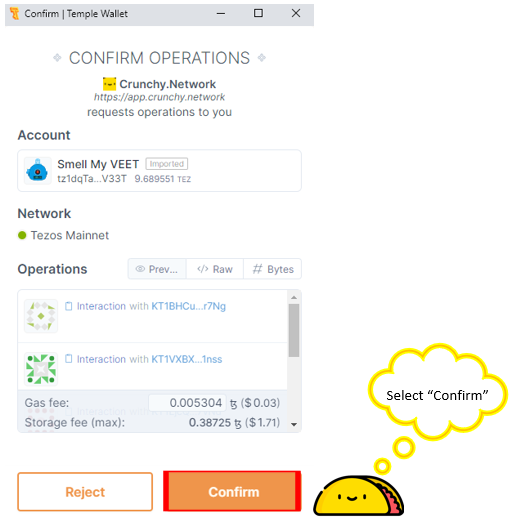
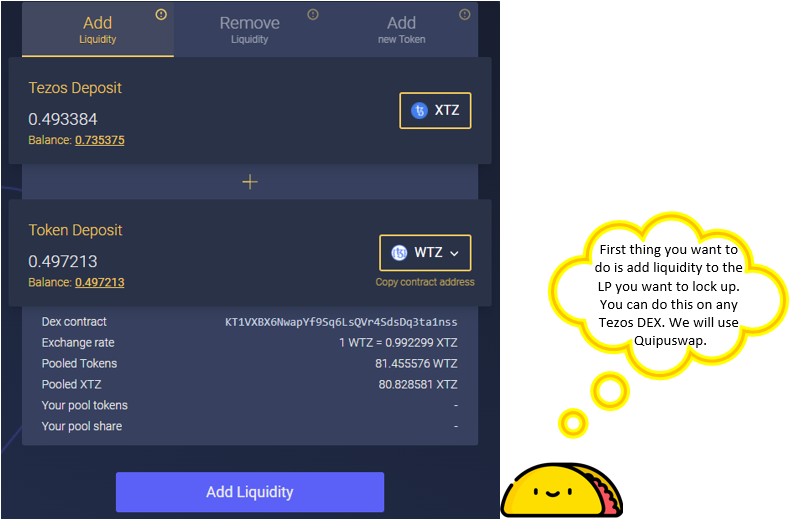
The first step you will need to take to add get LP to lock up is to add liquidity to a DEX. We chose the Quipuswap exchange and the Temple wallet, but you can get LP from any of Tezos’s DEXs utilizing any wallet. When you add liquidity, you are given “LP” tokens as proof of your staked liqudity. These are redemable tokens that you can revert back to your invested pair. For Quipuswap your first stop will be the “Add Liquidity” tab under the “Invest” category. Here you will be prompted to chose XTZ and the equivalent price of a second token. In this example we used WTZ. Enter the amount of LP you would like to stake and press “Add Liquidity”.
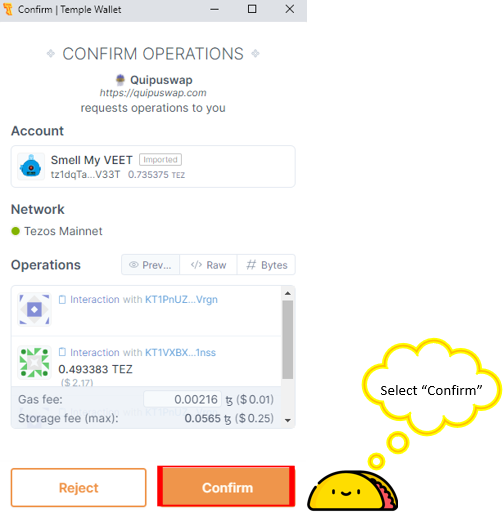
After you have selected “Add Liquidity”, you will need to confirm the transaction.
¶ Putting Your LP In the Deep Freezer
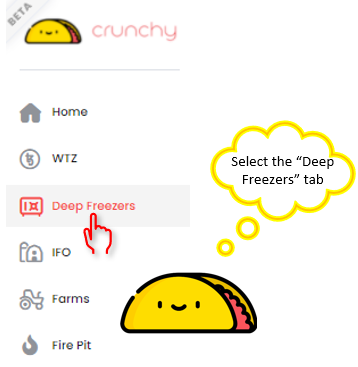
Now that you have your LP, it’s time to go freeze them! You can naviage to the “Deep Freezer” tab by going to the Crunchy main page, moving your cursor to the left side of the screen and clicking “Deep Freezers”.
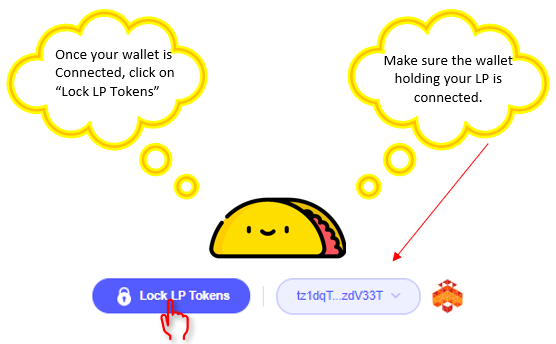
You will now connect your wallet. Click on the “Connect Wallet” tab (our wallet is currently connected in this picture. Once your wallet is connected it will show your address in this field) then click the “Lock LP Tokens” tab.
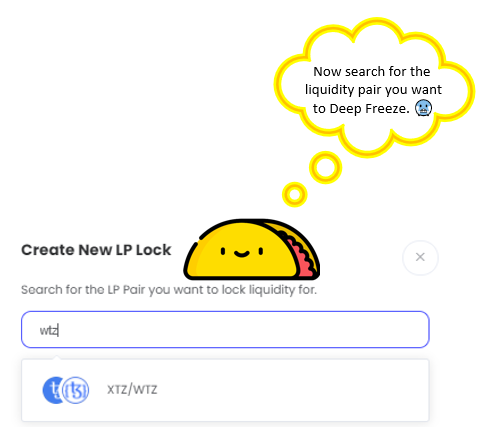
You will now choose the LP type you want to lock up! Since we added liquidity to the XTZ/WTZ token pair, we will chose that by typing in “WTZ” in the search field and selecting hte “XTZ/WTZ” pair in the pop-up field.
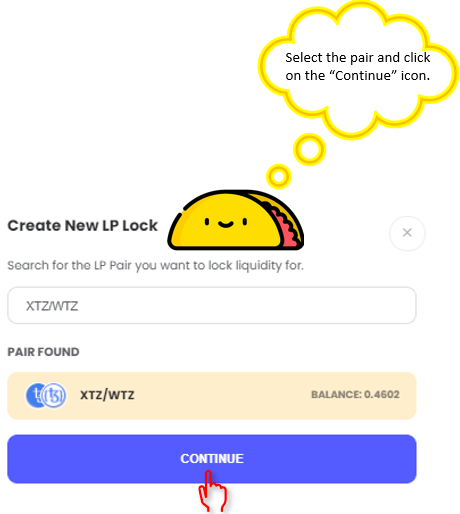
Now that you have the LP that you want to add selected, it will show the LP token balance you have. If this does not populate make sure the transaction for your liquidity went through. If the balance looks correct go ahead and select “Continue”.
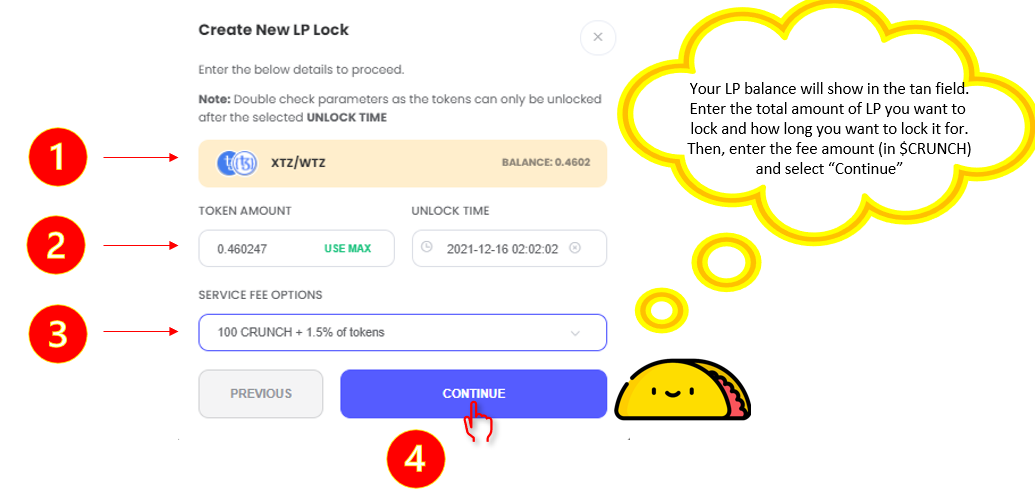
We now have the selected the LP we want to lock up and have verified the correct token pair and our LP balance. At this point you will choose the perameters for the lockup. There are 4 actions to do on this step:
- Verify that your LP token pair and the balance is correct once again.
- Select the total amount and unlock date of LP that you want to freeze.
- Select the fee you wish to pay for the lockup.
- Once you have set these parameters and are finished, click the “Continue” icon.
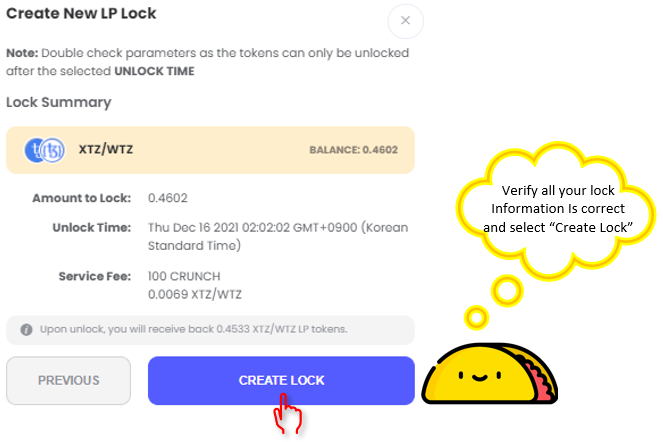
¶ Locking the Freezer
You will now get one final overview of your LP lockup details. If you are happy with the lock up information, go ahead and click the “Create Lock” icon. If you wish to make edits, click the “Previous” icon.
Click on the “Confirm” icon to complete your transaction. Congratulations! You now have locked your LP successfully!